Enabling SSL for a domain in HestiaCP is simple. Just follow these steps:
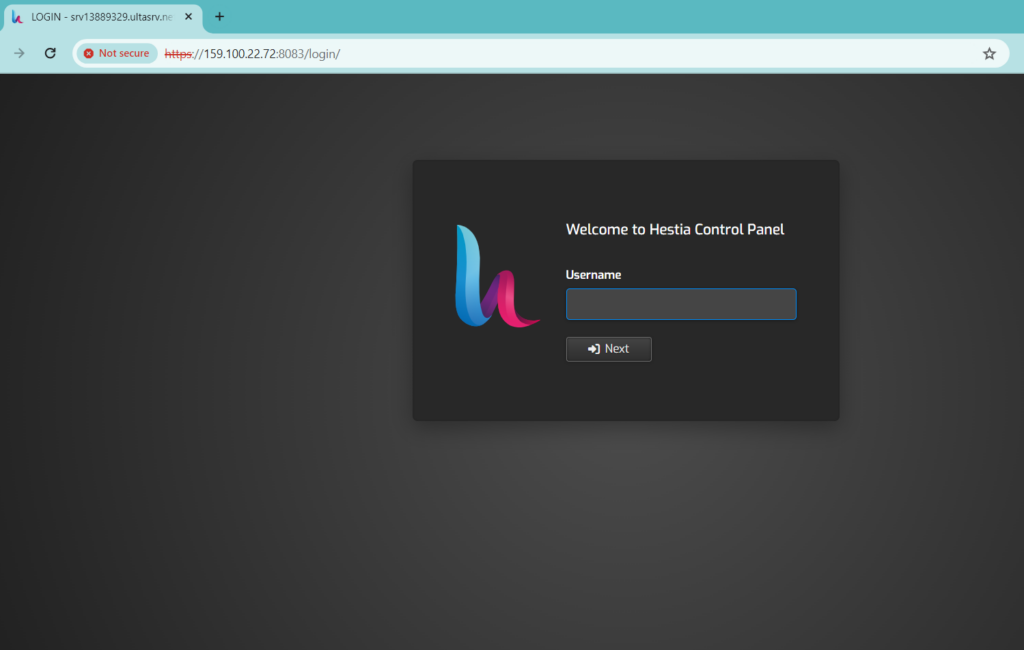
Log in to HestiaCP: Access your HestiaCP control panel by entering your VPS IP address and the default Hestia port (8083) in your web browser, like this: https://159.100.22.72:8083/
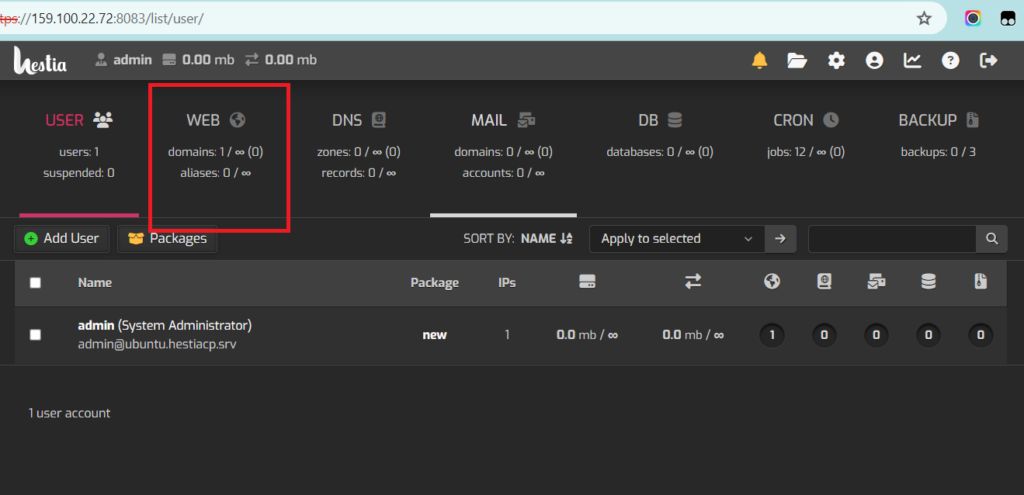
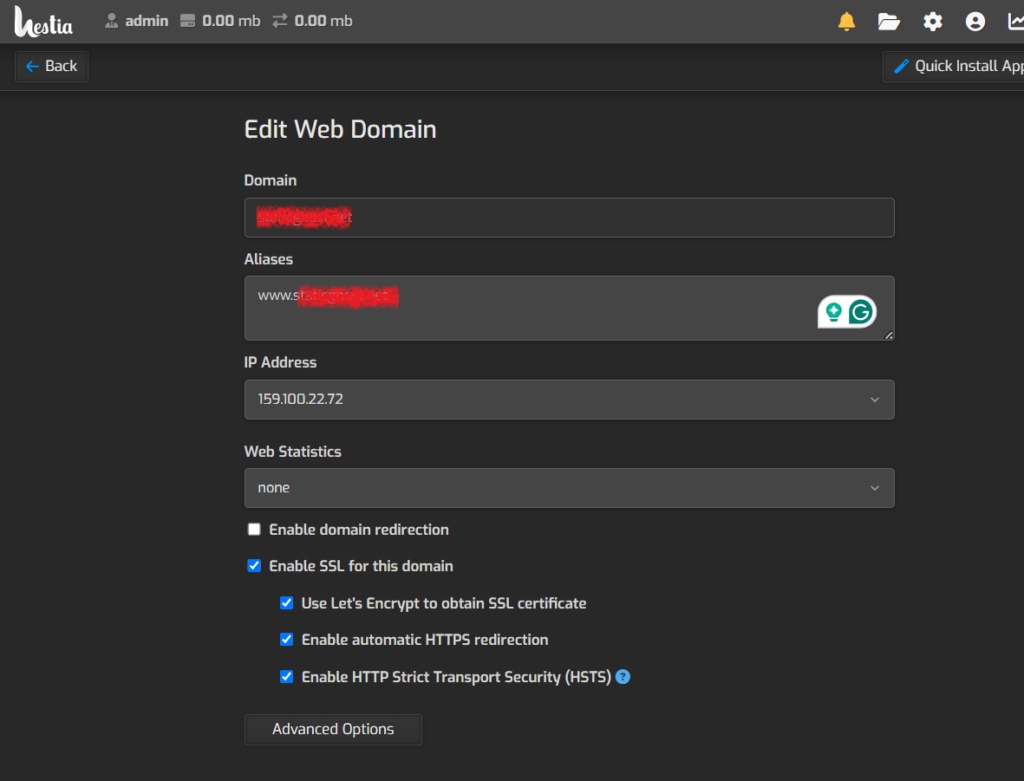
Add Domain: Go to the “Web” section and click on the domain you want to secure.
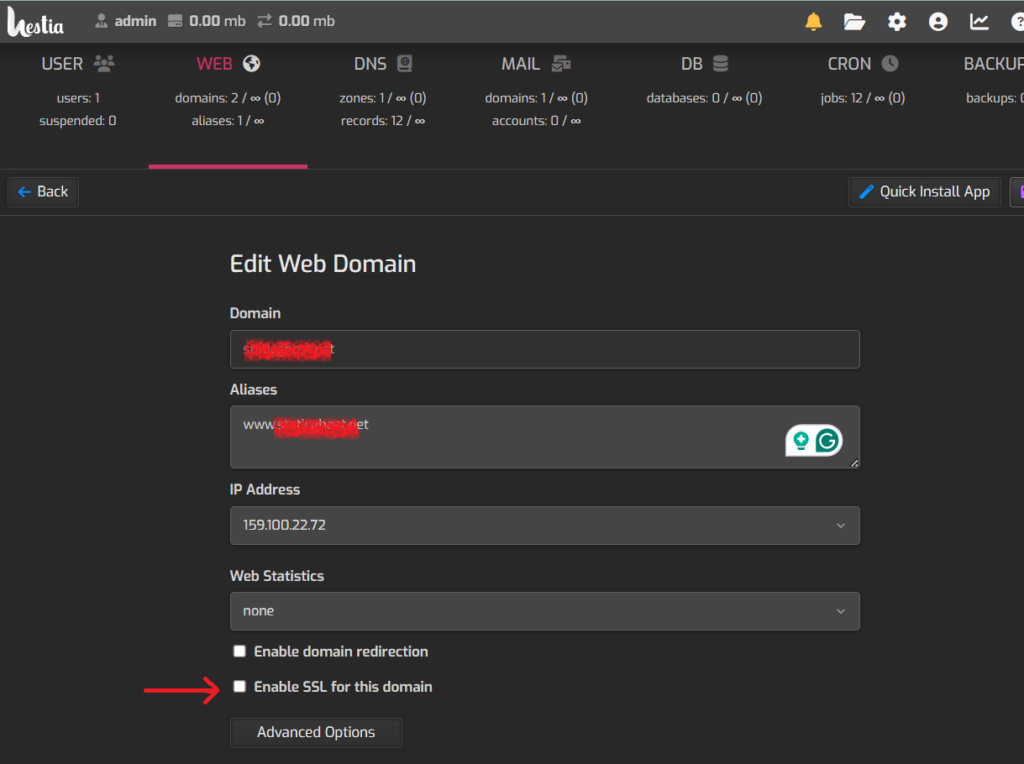
Activate SSL: On the “Edit Web Domain” page, check the box that says “Enable SSL for this domain.”
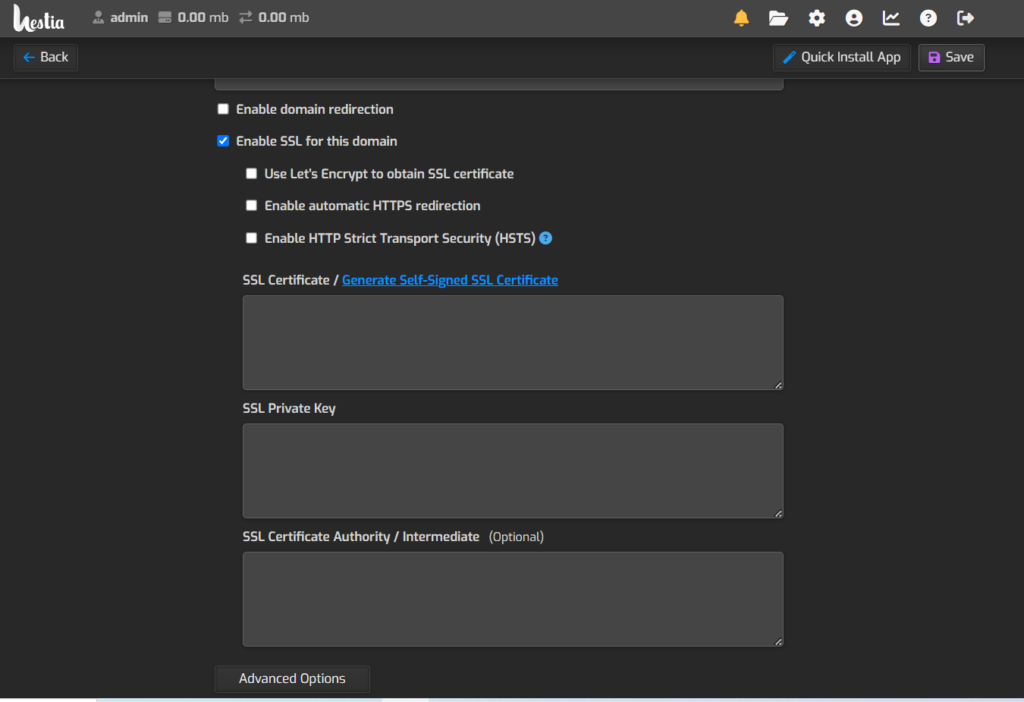
Upload Certificate: You can either generate a self-signed SSL certificate or upload a purchased SSL certificate here.
For a free option, choose the Let’s Encrypt SSL option. You can also enable additional settings like automatic HTTPS redirection.
Save Changes: Click on the ‘Save’ button to finalize the setup.